Tuesday, December 20, 2011

Pizza/Dad's Birthday

Today is my dad's birthday. Although it is not considered a milestone like 18, 21, or 50, it is important to my family. It was not important because of how old my dad is today, but because of who my dad is. My dad and I have always been close. A couple days ago I asked my dad what he wanted for his birthday dinner. I expected to hear salmon or roasted chicken, but instead he said pizza. Now many of you in the gluten-free community know how difficult it is to have good pizza. Over the last year I have made countless recipes trying to perfect something that was a Friday night staple in our house when I was growing up. I thought that this day would never come, but about a month ago I discovered the perfect pizza crust. It took a lot of tweaking but I finally have a dough that you can touch with your hands, not spread with a knife. I am ecstatic that I was able to have the perfect pizza crust recipe for my dad's birthday this year. If you are anything like me, pizza is the one thing that you miss the most when going gluten-free. Here is the recipe that is the game-changer. Go ahead... it's ok if you dance a little after making this(I won't tell anybody.)

Ingredients  
~ 1 teaspoon sugar
~ 1 cup lukewarm water
~ 1 teaspoon dried active yeast
~ 1 1/4 cups rice flour
~ 3/4 cup potato starch, extra for dusting
~ 1/2 cup tapioca flour
~ 1 teaspoon xanthan gum
~ 1 teaspoon salt
~ 1 Tablespoon olive oil
~ 1 egg

Directions 
1. Preheat your oven to 500 ° F 
2. Add your flours, salt, and xanthan gum in a bowl and mix well.
3. In a second bowl, add yeast, sugar, and lukewarm water. Wait about 5-10 until the yeast has "proofed." 
4. Add to this(yeast mixture) the olive oil and egg and mix well. 
5. Form a well in the center of your flour mix and add the liquid gradually, incorporating it into the flour. 
6. Continue to mix until the ingredients form a dough ball.(I use a Kitchenaid) 
7. Remove dough from bowl and knead lightly on a dusted(with potato starch) board. This ensures the dough is thoroughly mixed. 

8. Put the dough back in the bowl, cover with a tea towel, and place somewhere warm for 20-30 minutes to allow the dough to rise.(It will not double in size like wheat dough, but it will poof up a little.) 
9. After the dough has been allowed to rise and divide the dough in half. 
10. Flatten out the dough using your hands or a rolling pin. You want the dough to be about 1/4 inch in thickness. 
10. Add a sauce(I use tomato but you can use pesto, olive oil, or anything you have on hand.) 
Pepperoni with spinach, olives, and artichoke hearts  

Meatballs(recipe coming soon), olives, spinach/vegetarian pizza on other half 
11. Add your toppings. I have even made this recipe to make a dessert pizza. I put apples, cinnamon sugar, and butter. 
12. Cook on a preheated pizza stone for 8-10 minutes or until the cheese starts to bubble and brown.(you can put the pizza directly on the stone or on foil for easy clean-up) 
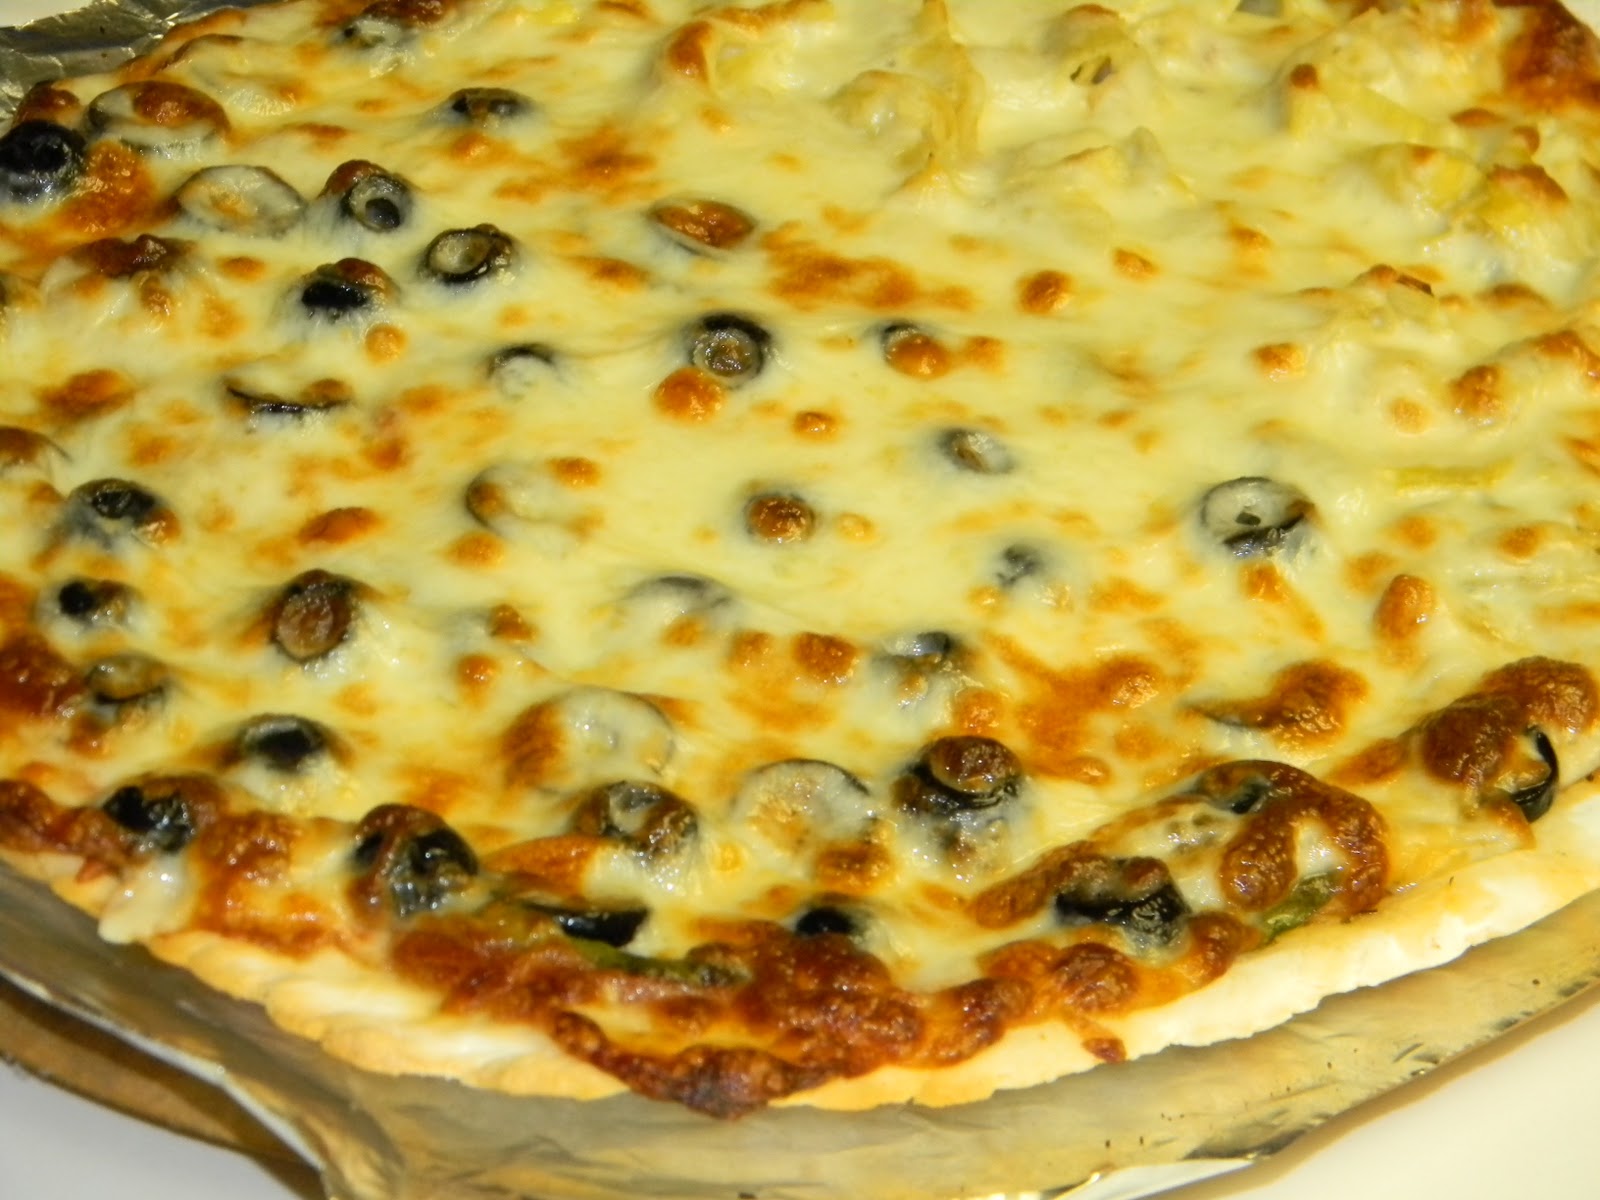
13. Enjoy! 

Thursday, November 24, 2011

Gluten-Free Biscuits

I love any kind of bread, including biscuits. However, when I discovered I had a severe wheat/gluten allergy I never imagined I would be able to have them again, let alone they be any good. This recipe is my third attempt at biscuits over the last year and I have finally achieved success. The first time, my biscuits turned out grainy and the second time, they were unpleasantly doughy. Since it was Thanksgiving, I thought I would give biscuits another try. I am so happy that I did because what I discovered was the perfect gluten-free biscuit, that is grain-free and not doughy(but not dry). I hope you all enjoy these as much as I do! :)

Ingredients
~ 2 cups of Better-Batter all-purpose flour
~ 1 Tablespoon baking powder
~ 2 teaspoons sugar
~ 1/2 teaspoon cream of tartar
~ 1/4 teaspoon salt
~ 1/2 cup of butter
~ 2/3 cup of buttermilk(you may need to add more, if you do- add 1/3 cup of regular milk) 


Flour mixture

biscuits baking


Finished biscuits


Directions
1. Preheat oven to 450° F.
2. In a bowl stir together flour, baking powder, sugar, cream of tartar, and salt.
3. Cut in the butter either with two knifes, a pastry cutter, or a paddle attachment for your electric mixer.
4. Add the buttermilk. If the mixture seems dry add a little bit of regular milk.
5. You should have a dough that is not too wet and not too dry. (You should be able to touch it without it falling apart, or sticking to your hands.)
6. Using a ice cream scooper transfer the biscuits onto a baking sheet.
7. Bake in a 450°F oven for 10 to 12 minutes or until golden.
8. Serve warm. Enjoy!

Squash and Potato Smash

I love mash potatoes. I always have and I always will. I love them even more now that I am gluten-free. Since I eat potatoes almost 1-3 times a week, I wanted to mix it up a little since it was Thanksgiving. This is the easiest recipe and perfect for the holidays or the winter months. I love the evaporated milk in this recipe because it is a low calorie version of cream, and imparts a rich flavor without all the calories.

Ingredients
~ other half of evaporated milk from this recipe.
~ 1 stick of butter
~ 5-6 potatoes
~ 1 large butternut squash
~ salt/pepper to taste
Potatoes/Squash cooking

Squash and Potatoes smashed

Directions
1. Clean and peel potatoes and squash
2. Cut potatoes and squash into small pieces(you can pick the size, just make sure they are even.) 
3. Cook potatoes and squash over medium-high heat until tender
4. After the potatoes and squash are cooked, add the milk, butter, and seasonings and smash.
5. Enjoy!

XOXO,
The Gluten-Free Project

Pumpkin Crumble Cake

For all of you who know me personally you know I have kinda have a thing for pumpkin(in fact my nickname is pumpkin). Ever since I was little I would always have a big piece of pumpkin pie for Thanksgiving, Christmas, and even my birthday. I figured when I went gluten-free I would not be able to have pumpkin pie again. Although this recipe is not the conventional pumpkin pie it tastes exactly the same... in fact I think it might be better! Although this is a cake it has the texture of pumpkin pie filling with a crumble topping. I hope you all enjoy this recipe as much as my family and I did. :)

Ingredients
~1/2 bag of Pamela's vanilla cake mix; divided in half again
~ 1/2 large can of pumpkin-29 oz can(make sure it's the 100% pure pumpkin, not the pumpkin pie filling) 
~ 2 eggs  
~ 2 tsp. cinnamon 
~ nutmeg to taste
~ 1/2 can of evaporated milk(12 oz) 
~ 1/2 + 1/8 cup of packed brown sugar 
~ 1 cup of chopped nuts(you can use pecans, walnuts, almonds, etc) 
~ 1/2 stick of butter(1/4 cup) 


pumpkin crumble cake baking
pumpkin crumble cake(finished product)
Directions 
1. Preheat your oven to 350° F
2. Divide the half of the cake mix in half again(so you have 1/4 of the cake mix)
3. Combine 1/4 of the cake mix with the pumpkin, eggs, spices, milk, and brown sugar 
4. Blend until smooth in an electric mixer or by hand. 
5. Pour into a greased 9x13 pan. 
6. Sprinkle the remaining 1/4 cake mix with the chopped nuts onto the cake batter. 
7. Drizzle with the melted butter. 
8. Bake for 45-50 minutes or until a toothpick inserted comes out clean. 
9. Enjoy!


 XOXO, 
The Gluten-Free Project

Happy Thanksgiving! /One Year

Happy Thanksgiving! Today is a day to give thanks for all of life's blessings. I thank God for my amazing, supportive family and friends who have never left my side even in the tough times. Besides today being a day of food, family, and friends.... today is my one-year anniversary of being gluten free. This year has gone by so fast and I have learned so much from experimentation and from other bloggers. I hope that in the years to come I will continue growing in my journey of freedom from gluten. Today was a special day filled with love, food, and most importantly no stomach aches(well... maybe from overeating, but that's another kind of stomach ache!) My family and I had grilled chicken w/ goat's cheese spread, butternut squash smashed potatoes, asparagus, biscuits, and pumpkin crumble cake. I would love to hear about all of your thanksgiving adventures. :)

Pumpkin Crumble Cake

Pumpkin Crumble Cake

Squash and Potato Smash


 XOXO,
The Gluten-Free Project

Friday, November 11, 2011

Peach-Apricot Scones

I know the name peach-apricot scones is not the most appealing names for a bake-good, but believe me these scones are not like the English ones that almost break your tooth(no offense if you like English scones, I personally just don't like them). I have been trying to experiment with more recipes since the weather is getting colder. When the holidays come around I always get in the mood to bake more. : ) Today I had some flavored Greek yogurt that needed to be used up, and as they say "necessity is the mother of invention." These scones are one of the recipes that you can eat them anytime of the day. They are not super sweet, but they are sweet enough that you can have them for dessert.


Ingredients
~ 1/4 cup of dried fruit(You can put more or less depending on your taste.) Note: I used dried apricots.
~ 2 cups of Better Batter All-Purpose Flour
~ 1/4 cup of brown sugar
~ 2 teaspoons baking powder
~ 1/2 teaspoon baking soda
~ 1/4 cup of butter
~ 1 Tablespoon vanilla extract
~ 2 egg yolks
~ 18 oz of Greek flavored yogurt(the one with the fruit at the bottom) Note: I used Chobani peach 0% yogurt)
~ 1 cup of old-fashioned oats
Directions
1. Preheat your oven to 400°
2. In a large mixing bowl combine flour, brown sugar, baking powder, and baking soda.
3. Using a pastry blender, cut in the butter until mixture resembles coarse crumbs.
4. After you have the butter cut in, add the oats. You can add the oats before you cut the butter in, but I think it is easier to add them afterwards.
5. In a small mixing bowl combine the dried fruit, yogurt, egg yolks, and vanilla
6. Mix the wet and the dry ingredients together.
7. Bake for 10-12 minutes.
8. Enjoy!

Monday, November 7, 2011

Chocolate Chip Cookies

I have always loved chocolate chip cookies. Chocolate chip cookies are something that remind you of your childhood. You always see those commercials for Toll House cookies that have the mother or grandmother baking cookies with the kids. Since I have grown up with chocolate chip cookies giving me that "warm and fuzzy" feeling of home when I eat one, I was devastated when I went gluten-free almost a year ago. I told myself that I would never be able to have that feeling again. Well, I was wrong. I have found a recipe that is like my mom's homemade chocolate chip cookies that I was raised on. I have had a lot of people asking for this recipe, so here it is. I hope you guys enjoy it as much as I do. 

Ingredients
1 1/4 cups of butter(softened, not melted)
2 cups of sugar(you can use brown if you like the flavor)
2 teaspoons of vanilla(seems like a lot but I like vanilla- you can use less if you like)
1 egg
3 cups of Pamela's Baking & Pancake Mix(be sure to sift!)
1/4 teaspoon salt
1 1/4 cups of chocolate chips(you can put more or less depending on how chocolate you like)
1 1/2 cups coconut

Directions
1. Preheat the oven to 350° F
2. Cream the butter and the sugar.
3. Then add the egg and vanilla.
4. Sift the baking & pancake mix(important step!)Then, add the flour and salt.
5. Next, add the coconut and chocolate chips.
6. Mix everything together until incorporated.
7. Scoop onto a greased aluminum foil with a teaspoon or small ice cream scoop.
8. Make for 10-12 minutes depending on your oven.
9. Enjoy!   
Yields: 2 dozen 

 Note:  
1. You can add dried fruit(for example cherries which are very good with chocolate) 
2. If you can't have chocolate you can use cherries, raisins, cranberries, etc. 
3. You can add orange or lemon yest if you add dried fruit instead of vanilla

Tuesday, December 20, 2011

Pizza/Dad's Birthday

Today is my dad's birthday. Although it is not considered a milestone like 18, 21, or 50, it is important to my family. It was not important because of how old my dad is today, but because of who my dad is. My dad and I have always been close. A couple days ago I asked my dad what he wanted for his birthday dinner. I expected to hear salmon or roasted chicken, but instead he said pizza. Now many of you in the gluten-free community know how difficult it is to have good pizza. Over the last year I have made countless recipes trying to perfect something that was a Friday night staple in our house when I was growing up. I thought that this day would never come, but about a month ago I discovered the perfect pizza crust. It took a lot of tweaking but I finally have a dough that you can touch with your hands, not spread with a knife. I am ecstatic that I was able to have the perfect pizza crust recipe for my dad's birthday this year. If you are anything like me, pizza is the one thing that you miss the most when going gluten-free. Here is the recipe that is the game-changer. Go ahead... it's ok if you dance a little after making this(I won't tell anybody.)

Ingredients  
~ 1 teaspoon sugar
~ 1 cup lukewarm water
~ 1 teaspoon dried active yeast
~ 1 1/4 cups rice flour
~ 3/4 cup potato starch, extra for dusting
~ 1/2 cup tapioca flour
~ 1 teaspoon xanthan gum
~ 1 teaspoon salt
~ 1 Tablespoon olive oil
~ 1 egg

Directions 
1. Preheat your oven to 500 ° F 
2. Add your flours, salt, and xanthan gum in a bowl and mix well.
3. In a second bowl, add yeast, sugar, and lukewarm water. Wait about 5-10 until the yeast has "proofed." 
4. Add to this(yeast mixture) the olive oil and egg and mix well. 
5. Form a well in the center of your flour mix and add the liquid gradually, incorporating it into the flour. 
6. Continue to mix until the ingredients form a dough ball.(I use a Kitchenaid) 
7. Remove dough from bowl and knead lightly on a dusted(with potato starch) board. This ensures the dough is thoroughly mixed. 

8. Put the dough back in the bowl, cover with a tea towel, and place somewhere warm for 20-30 minutes to allow the dough to rise.(It will not double in size like wheat dough, but it will poof up a little.) 
9. After the dough has been allowed to rise and divide the dough in half. 
10. Flatten out the dough using your hands or a rolling pin. You want the dough to be about 1/4 inch in thickness. 
10. Add a sauce(I use tomato but you can use pesto, olive oil, or anything you have on hand.) 
Pepperoni with spinach, olives, and artichoke hearts  

Meatballs(recipe coming soon), olives, spinach/vegetarian pizza on other half 
11. Add your toppings. I have even made this recipe to make a dessert pizza. I put apples, cinnamon sugar, and butter. 
12. Cook on a preheated pizza stone for 8-10 minutes or until the cheese starts to bubble and brown.(you can put the pizza directly on the stone or on foil for easy clean-up) 
13. Enjoy! 

Thursday, November 24, 2011

Gluten-Free Biscuits

I love any kind of bread, including biscuits. However, when I discovered I had a severe wheat/gluten allergy I never imagined I would be able to have them again, let alone they be any good. This recipe is my third attempt at biscuits over the last year and I have finally achieved success. The first time, my biscuits turned out grainy and the second time, they were unpleasantly doughy. Since it was Thanksgiving, I thought I would give biscuits another try. I am so happy that I did because what I discovered was the perfect gluten-free biscuit, that is grain-free and not doughy(but not dry). I hope you all enjoy these as much as I do! :)

Ingredients
~ 2 cups of Better-Batter all-purpose flour
~ 1 Tablespoon baking powder
~ 2 teaspoons sugar
~ 1/2 teaspoon cream of tartar
~ 1/4 teaspoon salt
~ 1/2 cup of butter
~ 2/3 cup of buttermilk(you may need to add more, if you do- add 1/3 cup of regular milk) 


Flour mixture

biscuits baking


Finished biscuits


Directions
1. Preheat oven to 450° F.
2. In a bowl stir together flour, baking powder, sugar, cream of tartar, and salt.
3. Cut in the butter either with two knifes, a pastry cutter, or a paddle attachment for your electric mixer.
4. Add the buttermilk. If the mixture seems dry add a little bit of regular milk.
5. You should have a dough that is not too wet and not too dry. (You should be able to touch it without it falling apart, or sticking to your hands.)
6. Using a ice cream scooper transfer the biscuits onto a baking sheet.
7. Bake in a 450°F oven for 10 to 12 minutes or until golden.
8. Serve warm. Enjoy!

Squash and Potato Smash

I love mash potatoes. I always have and I always will. I love them even more now that I am gluten-free. Since I eat potatoes almost 1-3 times a week, I wanted to mix it up a little since it was Thanksgiving. This is the easiest recipe and perfect for the holidays or the winter months. I love the evaporated milk in this recipe because it is a low calorie version of cream, and imparts a rich flavor without all the calories.

Ingredients
~ other half of evaporated milk from this recipe.
~ 1 stick of butter
~ 5-6 potatoes
~ 1 large butternut squash
~ salt/pepper to taste
Potatoes/Squash cooking

Squash and Potatoes smashed

Directions
1. Clean and peel potatoes and squash
2. Cut potatoes and squash into small pieces(you can pick the size, just make sure they are even.) 
3. Cook potatoes and squash over medium-high heat until tender
4. After the potatoes and squash are cooked, add the milk, butter, and seasonings and smash.
5. Enjoy!

XOXO,
The Gluten-Free Project

Pumpkin Crumble Cake

For all of you who know me personally you know I have kinda have a thing for pumpkin(in fact my nickname is pumpkin). Ever since I was little I would always have a big piece of pumpkin pie for Thanksgiving, Christmas, and even my birthday. I figured when I went gluten-free I would not be able to have pumpkin pie again. Although this recipe is not the conventional pumpkin pie it tastes exactly the same... in fact I think it might be better! Although this is a cake it has the texture of pumpkin pie filling with a crumble topping. I hope you all enjoy this recipe as much as my family and I did. :)

Ingredients
~1/2 bag of Pamela's vanilla cake mix; divided in half again
~ 1/2 large can of pumpkin-29 oz can(make sure it's the 100% pure pumpkin, not the pumpkin pie filling) 
~ 2 eggs  
~ 2 tsp. cinnamon 
~ nutmeg to taste
~ 1/2 can of evaporated milk(12 oz) 
~ 1/2 + 1/8 cup of packed brown sugar 
~ 1 cup of chopped nuts(you can use pecans, walnuts, almonds, etc) 
~ 1/2 stick of butter(1/4 cup) 


pumpkin crumble cake baking
pumpkin crumble cake(finished product)
Directions 
1. Preheat your oven to 350° F
2. Divide the half of the cake mix in half again(so you have 1/4 of the cake mix)
3. Combine 1/4 of the cake mix with the pumpkin, eggs, spices, milk, and brown sugar 
4. Blend until smooth in an electric mixer or by hand. 
5. Pour into a greased 9x13 pan. 
6. Sprinkle the remaining 1/4 cake mix with the chopped nuts onto the cake batter. 
7. Drizzle with the melted butter. 
8. Bake for 45-50 minutes or until a toothpick inserted comes out clean. 
9. Enjoy!


 XOXO, 
The Gluten-Free Project

Happy Thanksgiving! /One Year

Happy Thanksgiving! Today is a day to give thanks for all of life's blessings. I thank God for my amazing, supportive family and friends who have never left my side even in the tough times. Besides today being a day of food, family, and friends.... today is my one-year anniversary of being gluten free. This year has gone by so fast and I have learned so much from experimentation and from other bloggers. I hope that in the years to come I will continue growing in my journey of freedom from gluten. Today was a special day filled with love, food, and most importantly no stomach aches(well... maybe from overeating, but that's another kind of stomach ache!) My family and I had grilled chicken w/ goat's cheese spread, butternut squash smashed potatoes, asparagus, biscuits, and pumpkin crumble cake. I would love to hear about all of your thanksgiving adventures. :)

Pumpkin Crumble Cake

Pumpkin Crumble Cake

Squash and Potato Smash


 XOXO,
The Gluten-Free Project

Friday, November 11, 2011

Peach-Apricot Scones

I know the name peach-apricot scones is not the most appealing names for a bake-good, but believe me these scones are not like the English ones that almost break your tooth(no offense if you like English scones, I personally just don't like them). I have been trying to experiment with more recipes since the weather is getting colder. When the holidays come around I always get in the mood to bake more. : ) Today I had some flavored Greek yogurt that needed to be used up, and as they say "necessity is the mother of invention." These scones are one of the recipes that you can eat them anytime of the day. They are not super sweet, but they are sweet enough that you can have them for dessert.


Ingredients
~ 1/4 cup of dried fruit(You can put more or less depending on your taste.) Note: I used dried apricots.
~ 2 cups of Better Batter All-Purpose Flour
~ 1/4 cup of brown sugar
~ 2 teaspoons baking powder
~ 1/2 teaspoon baking soda
~ 1/4 cup of butter
~ 1 Tablespoon vanilla extract
~ 2 egg yolks
~ 18 oz of Greek flavored yogurt(the one with the fruit at the bottom) Note: I used Chobani peach 0% yogurt)
~ 1 cup of old-fashioned oats
Directions
1. Preheat your oven to 400°
2. In a large mixing bowl combine flour, brown sugar, baking powder, and baking soda.
3. Using a pastry blender, cut in the butter until mixture resembles coarse crumbs.
4. After you have the butter cut in, add the oats. You can add the oats before you cut the butter in, but I think it is easier to add them afterwards.
5. In a small mixing bowl combine the dried fruit, yogurt, egg yolks, and vanilla
6. Mix the wet and the dry ingredients together.
7. Bake for 10-12 minutes.
8. Enjoy!

Monday, November 7, 2011

Chocolate Chip Cookies

I have always loved chocolate chip cookies. Chocolate chip cookies are something that remind you of your childhood. You always see those commercials for Toll House cookies that have the mother or grandmother baking cookies with the kids. Since I have grown up with chocolate chip cookies giving me that "warm and fuzzy" feeling of home when I eat one, I was devastated when I went gluten-free almost a year ago. I told myself that I would never be able to have that feeling again. Well, I was wrong. I have found a recipe that is like my mom's homemade chocolate chip cookies that I was raised on. I have had a lot of people asking for this recipe, so here it is. I hope you guys enjoy it as much as I do. 

Ingredients
1 1/4 cups of butter(softened, not melted)
2 cups of sugar(you can use brown if you like the flavor)
2 teaspoons of vanilla(seems like a lot but I like vanilla- you can use less if you like)
1 egg
3 cups of Pamela's Baking & Pancake Mix(be sure to sift!)
1/4 teaspoon salt
1 1/4 cups of chocolate chips(you can put more or less depending on how chocolate you like)
1 1/2 cups coconut

Directions
1. Preheat the oven to 350° F
2. Cream the butter and the sugar.
3. Then add the egg and vanilla.
4. Sift the baking & pancake mix(important step!)Then, add the flour and salt.
5. Next, add the coconut and chocolate chips.
6. Mix everything together until incorporated.
7. Scoop onto a greased aluminum foil with a teaspoon or small ice cream scoop.
8. Make for 10-12 minutes depending on your oven.
9. Enjoy!   
Yields: 2 dozen 

 Note:  
1. You can add dried fruit(for example cherries which are very good with chocolate) 
2. If you can't have chocolate you can use cherries, raisins, cranberries, etc. 
3. You can add orange or lemon yest if you add dried fruit instead of vanilla