Thursday, January 22, 2015

Adapting the Classics: Coming Soon!

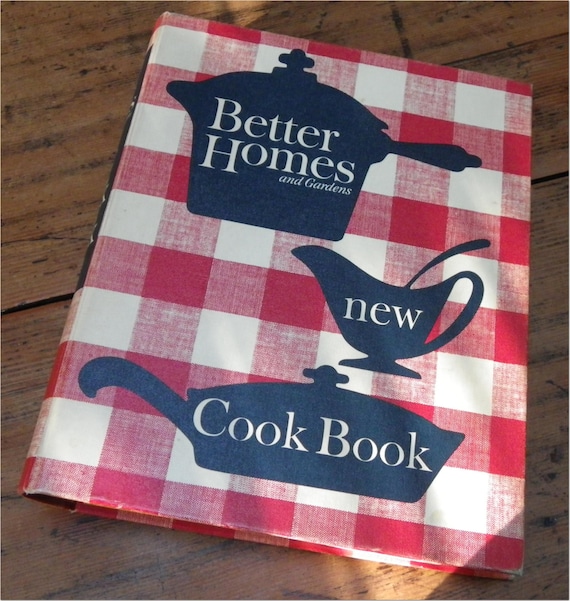
As many of my followers know I have not posted in a very long time. Without getting too much into detail, the past year has been filled with ups and downs, but through it all I have been able to turn to food in the process. While many assume that statement is due to eating, I in fact mean my love for baking and cooking. I find it reassuring that in every event, blessing, or trial that I experience, that the structure of baking will always be consistent. I find comfort that a tablespoon will always be a tablespoon, and that a little flour and sugar can create memories among family members. During this past year I have been testing some of my own gluten free recipes, but the ones I keep coming back to are some of my grandmother's that she found in various cookbooks throughout the years(I do plan on sharing some of my original recipes at a later point). One of the more notable favorites of my late grandmother were the Better Homes cookbooks(my grandmother had several). One thing during my time of absence from blogging that has been on my heart is the fact that many of my grandmother's recipes were not gluten free. However, since her passing I have truly missed many of the things that she made. This got me thinking that the majority of us grew up on our grandmother's, mother's, aunt's, uncle's (or even friend's) cooking and baking, but now that we are gluten free we feel as though we can no longer enjoy those recipes. After thinking about this, over the past year I have been adapting the classics(or those classic recipes that are so near and dear to my heart), in order that I might enjoy them again. Therefore, due to how much gratification I got out of being able to reconnect with my late grandmother through her recipes by not only making them (but eating them too), I have decided to share with you not only those beloved recipes from old cookbooks (made gluten free!), but show you how to use your own family recipes and make them gluten free as well. I will be doing a new series (the first on this blog), called "Adapting the Classics." I would also love to hear your stories surrounding your experiences of food and family. Also, I always love suggestions and feedback. Keep on the look-out for my first recipe, Chocolate-Chip Peanut Butter Cookie Bars(GF/DF)!


Until Then,

Saturday, September 28, 2013

The Fluffiest Focaccia! (Dairy-Free too!)

If any of you are like me(and I imagine most of you are) being gluten-free can be a challenge at times. Don't get me wrong I appreciate the fact that I don't feel like someone punched me in the stomach after eating a piece of bread anymore, but lets face it I miss the texture of wheat bread. That soft, squishy texture that only wheat bread can provide is one of the last things that I have had a hard time recreating to the point that I don't want to "cheat." Over the past four years I have tried and failed so many times it's gotten to the point where I was starting to believe that maybe all the gluten-free bread companies just had me beat. However, the other day my perspective on gluten-free bread from scratch totally changed. I had the strangest "aha!" moment the other day though. I was thinking to myself why had I never tried to use whipped egg whites in bread in order to build that structure that is found in wheat bread(Like gluten, egg whites build structure by trapping air in the baking bread.) So I figured what the heck, after many failed attempts I might as well give it another go(I think it's been about a year since I have tried making gf bread). You know what? I am very glad that I can sit here and say that I conquered gluten-free bread! This is the BEST gluten-free bread I have ever had in four years and is the closest to the texture of wheat bread that I have come across(dairy free too!)

I hope you enjoy these as much as I do! :)
 
xoxo,
Megan

Ingredients


Dry
~ 2 cups white rice flour 
~ 1/2 cup potato starch 
~1/2 tapioca starch 
~1/3 cup cornstarch 
~1 Tablespoon xanthan gum
~ 1 1/2 teaspoons salt 
~ 3 Tablespoons sugar 
~ 1 Tablespoon active dry yeast 
~ garlic powder(optional
~ dried parsley(optional) 
Wet 
~ 4 egg whites
~ 4 Tablespoons olive oil 
~ 1 teaspoon apple cider vinegar 
~ 1 1/4 cups warm water 

Directions 

1. Preheat your oven to 400 °FIn a bowl of a stand mixer put the active dry yeast, sugar, and warm water. Let the yeast proof for about 5-10 minutes(or until it looks very bubbly. 
2.In a stainless steel or copper bowl(I recommend a copper bowl for this step, although you don't have to have it-it does help the egg whites become even fluffier), put the egg whites along with a pinch of cream of tarter(use GFCF cream of tarter). Beat the egg whites until they are at a soft peaks. Set aside. 

Egg whites at the "soft peak" step


3.Now that the yeast has proofed, add the olive oil, the apple cider vinegar until just combined. 
4.  On a piece of wax paper(saves dishes!) put the rice flour, potato starch, tapioca starch, cornstarch, xanthan gum, and salt. After the flour mixture is in the stand mixer, using the paddle attachment, start slowly on the first setting and work your way up to the highest setting. Whip the mixture for about 3-5 min until creamy and all the flour is incorporated. Turn off the mixer and add the egg whites. Then turn the mixer back on to incorporate the egg whites(just until they are combined though because you don't want to loss all that air that we have built up). 
5. In a warm place in your kitchen(put a towel over the bowl to trap even more heat), let the mixture rise until the dough has risen about a quarter more than its original size(about 30 min). Next, place the mixture on a rimmed baking sheet and let rise once again for another 30 min. NOTE: Make sure that you spray the pan with nonstick cooking spray, otherwise your dough will stick. 
6. Sprinkle focaccia with garlic powder and dried parsley if desired. Bake focaccia for about 15-20 min or until light golden brown depending on your oven. Drizzle some more olive oil on the bread when its still warm. Enjoy! NOTE: This bread is amazing when served warm, however it is still great the next day if you warm it up in a pan or the microwave for a few seconds. Not a lot of gluten-free bread hold up their texture without becoming grainy(and this one DOES!) 


Wednesday, June 12, 2013

Chocolate Chip Marble Pancakes

I am one of the those kinds of people that doesn't like to do things the "normal way." I have always enjoyed experimenting and tweaking recipes to fit my particular taste. Looking back I don't think I have ever actually followed a recipe exactly. I have a habit of usually putting my own spin on something, whether that be adding or taking out ingredients. A few days ago I was actually researching wedding cake flavors and saw a chocolate marble cake. I happen to have just made pancakes and wondered if anyone had ever done a gluten-free, dairy free marble pancake. I researched it and found that there was no such thing. At first I was reluctant about how complicated it would be to accomplish this, but in the end is was a lot simpler than I thought (and totally worth it!) They are not only delicious but combine the best of both worlds. They are great for any crowd, whether you are entertaining chocoholics or simple vanilla lovers.

I hope you enjoy these as much as I do! :)

xoxo,
Megan

Ingredients

Dry
~ 1 cup white rice flour 
~ 1/2 cup cornstarch 
~ 1/2 cup sweet rice flour 
~ 1/4 cup granulated sugar 
~ 1/2 teaspoon salt 
~1/4 teaspoon xanthan gum  
NOTE: Split the above recipe in half and put in two bowls. The chocolate base and the vanilla base start with the same dry ingredients. You can add dairy free chocolate chips to the chocolate dry ingredients or at the end while cooking. 
Wet(Chocolate) 
~ 1 large egg
~ 1/2 cup Silk Chocolate Almond Milk (or any brand of chocolate almond milk) 
~ 1/8 cup canola oil 
~ 2 Tablespoon dairy-free chocolate syrup 
Wet(Vanilla) 
~ 1 large egg
~ 1/2 cup Silk Vanilla Almond Milk (or any brand of vanilla almond milk) 
~ 1/8 cup canola oil 
~ 2 teaspoons vanilla extract


Directions 

1 In two medium bowls, whisk together the dry ingredients. In a small bowl, whisk together the wet ingredients. Pour the wet ingredients over the dry ingredients and whisk until smooth. Note: You should have two batters (a chocolate and vanilla). 
 Heat griddle over medium to medium-high heat(depending on how efficient your griddle is). Pour the chocolate batter on one side and the vanilla on the other side to form one pancake onto griddle. Batter should "sizzle" when it hits the pan. Take a knife or a fork and swirl the batter to make the "marble" design. Place dairy free chocolate chips onto the chocolate side in order to reinforce the chocolate flavor. 
3 Cook for approximately 2-3 minutes. Flip pancakes when bubbles appear all over the surface of the pancake and begin to pop. The pancake should begin to look almost dry. Flip and cook another 1-1 1/2 minutes. 
4 Serve with dairy-free butter or/and syrup if desired. Enjoy! 

Monday, May 20, 2013

Vanilla Cinnamon Glazed Donuts

It's interesting how a combination of flour, sugar, eggs, and milk can bring back such fond memories. I remember growing up my dad or mom would take me to go get donuts at the local donut shop on special occasions. Whether it was a choir performance, because I was sick, or because I made straight A's in school that quarter, I always looked forward for the chance to get to taste a batch straight from the fryer. My family went so often that we had figured out the timing of when they put out the new ones. While I really enjoyed every flavor of donut I tried, there was one flavor that was still missing. I have always enjoyed vanilla and cinnamon, to the point that growing up I would put either vanilla or cinnamon on EVERYTHING. I wanted to try making homemade donuts growing up, but was always intimidated by the process. However, when I went gluten-free I no longer was given the same opportunities for getting donuts at a shop. Because I had not had a donut in almost 3 years I felt that it was the perfect time to try making them homemade with the flavor combination that I had always dreamed of.

Coming Soon! - I am experimenting with a vanilla maple glazed donut.

I hope you all enjoy these as much as I do! :)

xoxo,
Megan

Ingredients

Dry
~ 1/3 cup white rice flour 
~ 2 Tablespoons potato starch
~ 1 Tablespoon tapioca starch
~ 1/4 teaspoon xanthan gum
~ 3 Tablespoons sugar
~ 1/2 teaspoon baking powder
~ 1/8 teaspoon cinnamon
~ 1/8 teaspoon salt
 
Wet 
~ 3 Tablespoons vanilla almond milk
~ 1 large egg
~ 1 Tablespoon vanilla extract
~ 1/2 Tablespoon(1 1/2 teaspoons) Earth Balance soy-free buttery spread(you can use any vegan butter-I just prefer this brand)
 
Vanilla Glaze
~ 1/4 cup powdered sugar
~ 1/4 teaspoon vanilla extract
~1 teaspoon vanilla almond milk
 
Directions 
1. In a medium bowl, whisk together the dry ingredients. In a small bowl, whisk together the wet ingredients. Pour the wet ingredients over the dry ingredients and whisk until smooth.
2. While the batter is sitting heat a donut maker(If you don't have a donut maker you can use a mini donut pan and bake them in a 350° oven).
3. Pour the batter into the maker(or pan) and bake for about 2-3 minutes(or until they are light golden brown).
4. Let them cool on a cooling rack for about 2-4 minutes(or until you can touch them). While they are still warm(but not hot), dip the donuts into the vanilla glaze. Let the glaze dry. Enjoy!

Sunday, May 5, 2013

Double Double Chocolate Peanut Butter Pancakes

I first want to apologize for the amount of time that has gone by since my last blog post. Life has been crazy-busy for me lately, with lots of exciting and thrilling changes. One of these changes is me deciding to go dairy-free as well. This past year has been interesting to say the least, but I finally can say that even with all the ups and downs I have finished my first year of college. On a different note, the last couple months when I have gotten a free chance I have been developing and testing some new recipes that are dairy free as well as gluten-free. After countless failures of lumpy, grainy, or flavorless pancakes I have finally discovered the perfect pancake. This pancake is not for the faint of heart though. It is packed for chocolate flavor, with a hint of peanut butter. It is truly for all the chocolate lovers out there(including myself!).

Coming Soon! - I have developed a peanut butter and chocolate pancake that tastes like a Reese's peanut butter cup for those that like more peanut butter rather than chocolate.

I hope you all enjoy these as much as I do! :)

xoxo,
Megan


Ingredients

Dry
~ 1/2 cup white rice flour 
~ 1/4 cup cornstarch 
~ 1/4 cup sweet rice flour 
~ 1/8 cup granulated sugar 
~ 1/4 teaspoon salt 
~1/8 teaspoon xanthan gum 
~ 1/4 dairy-free chocolate chips

Wet 
~ 1 large egg
~ 1/2 cup Silk Chocolate Almond Milk(or any brand of chocolate almond milk) 
~ 1/8 cup canola oil 
~ 1/2 teaspoon vanilla extract
~ 3 tablespoons chunky or smooth peanut butter 

Directions 

1  In a medium bowl, whisk together the dry ingredients. In a small bowl, whisk together the wet ingredients. Pour the wet ingredients over the dry ingredients and whisk until smooth. 
2  Heat griddle over medium to medium-high heat(depending on how efficient your griddle is). Pour batter, approximately 1/4 cup, onto griddle. Batter should "sizzle" when it hits the pan. 
3 Cook for approximately 2-3 minutes. Flip pancakes when bubbles appear all over the surface of the pancake and begin to pop. The pancake should begin to look almost dry. Flip and cook another 1-1 1/2 minutes. 
4 Serve with dairy-free butter or/and syrup if desired. Enjoy! 


Sunday, September 30, 2012

Gluten-Free Biscuits(Updated)


For those of you who know me I love any kind of bread, including biscuits. However, when I discovered I had a severe wheat/gluten allergy I never imagined I would be able to have them again, let alone they be any good. Last Thanksgiving I made my Mom's biscuit recipe with the Better-Batter all purpose flour. While this mix of flour is perfect for cookies and cakes, I have discovered that it does not work well for biscuits. Over the past 8 months or so I have discovered that Cup4Cup(you can get it here) for biscuits makes a world of a difference. You can not see the difference between the two biscuits, but when you taste them I promise there is no aftertaste whatsoever. My parents, who both still eat wheat/gluten, tried them and I got their "stamp of approval."

 I hope you all enjoy these as much as I do! :)

 xoxo,
The Gluten- Free Project

Ingredients
~ 2 cups of Cup4Cup flour
~ 1 Tablespoon baking powder
~ 2 teaspoons sugar
~ 1/2 teaspoon cream of tartar
~ 1/4 teaspoon salt
~ 1/2 cup of butter
~ 2/3 cup of milk(you can also use buttermilk but it will be a thicker dough)


Flour mixture

biscuits baking


Finished biscuits


Directions
1. Preheat oven to 450° F.
2. In a bowl stir together flour, baking powder, sugar, cream of tartar, and salt.
3. Cut in the butter either with two knifes, a pastry cutter, or a paddle attachment for your electric mixer.
4. Add the milk. If the mixture seems dry add a little bit more milk.
5. You should have a dough that is not too wet and not too dry. (You should be able to touch it without it falling apart, or sticking to your hands.)
6. Using a ice cream scoop-er(like the ones you use for muffins)transfer the biscuits onto a baking sheet.
7. Bake in a 450°F oven for 10 to 12 minutes or until golden.
8. Serve warm. Enjoy!

Tuesday, December 20, 2011

Pizza/Dad's Birthday

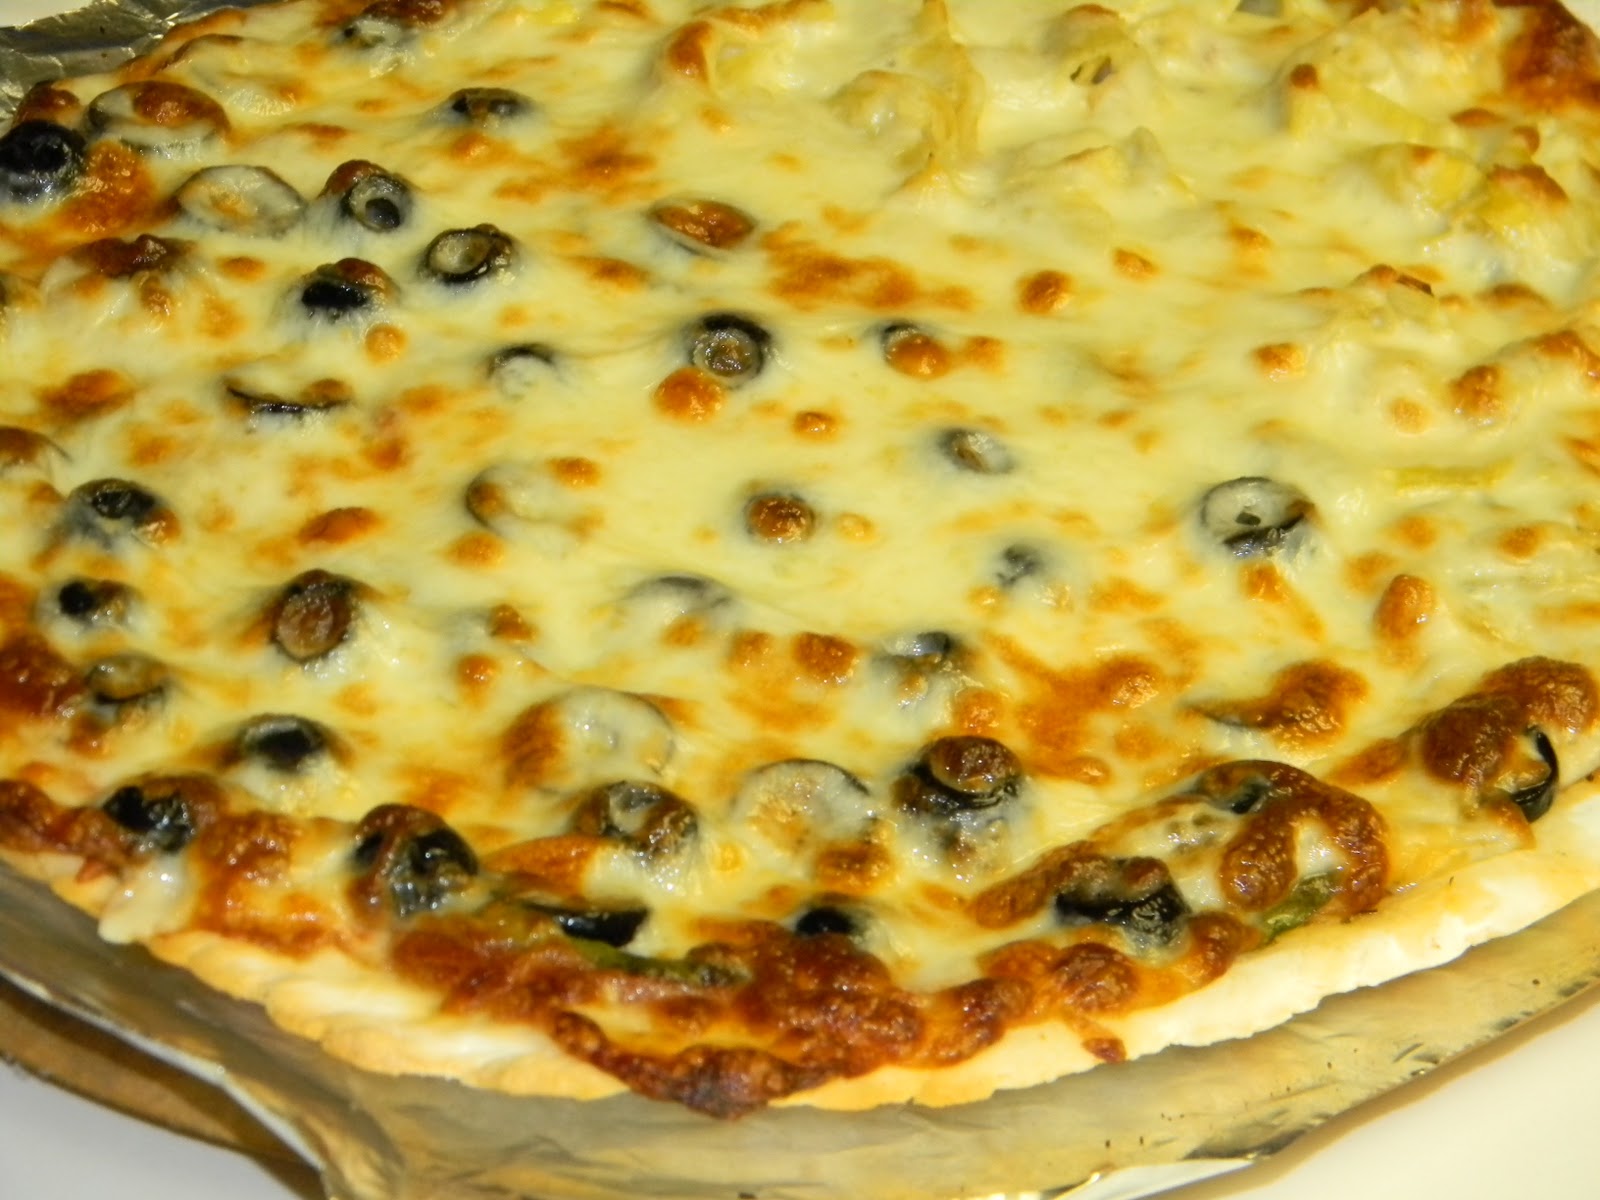
Today is my dad's birthday. Although it is not considered a milestone like 18, 21, or 50, it is important to my family. It was not important because of how old my dad is today, but because of who my dad is. My dad and I have always been close. A couple days ago I asked my dad what he wanted for his birthday dinner. I expected to hear salmon or roasted chicken, but instead he said pizza. Now many of you in the gluten-free community know how difficult it is to have good pizza. Over the last year I have made countless recipes trying to perfect something that was a Friday night staple in our house when I was growing up. I thought that this day would never come, but about a month ago I discovered the perfect pizza crust. It took a lot of tweaking but I finally have a dough that you can touch with your hands, not spread with a knife. I am ecstatic that I was able to have the perfect pizza crust recipe for my dad's birthday this year. If you are anything like me, pizza is the one thing that you miss the most when going gluten-free. Here is the recipe that is the game-changer. Go ahead... it's ok if you dance a little after making this(I won't tell anybody.)

Ingredients  
~ 1 teaspoon sugar
~ 1 cup lukewarm water
~ 1 teaspoon dried active yeast
~ 1 1/4 cups rice flour
~ 3/4 cup potato starch, extra for dusting
~ 1/2 cup tapioca flour
~ 1 teaspoon xanthan gum
~ 1 teaspoon salt
~ 1 Tablespoon olive oil
~ 1 egg

Directions 
1. Preheat your oven to 500 ° F 
2. Add your flours, salt, and xanthan gum in a bowl and mix well.
3. In a second bowl, add yeast, sugar, and lukewarm water. Wait about 5-10 until the yeast has "proofed." 
4. Add to this(yeast mixture) the olive oil and egg and mix well. 
5. Form a well in the center of your flour mix and add the liquid gradually, incorporating it into the flour. 
6. Continue to mix until the ingredients form a dough ball.(I use a Kitchenaid) 
7. Remove dough from bowl and knead lightly on a dusted(with potato starch) board. This ensures the dough is thoroughly mixed. 

8. Put the dough back in the bowl, cover with a tea towel, and place somewhere warm for 20-30 minutes to allow the dough to rise.(It will not double in size like wheat dough, but it will poof up a little.) 
9. After the dough has been allowed to rise and divide the dough in half. 
10. Flatten out the dough using your hands or a rolling pin. You want the dough to be about 1/4 inch in thickness. 
10. Add a sauce(I use tomato but you can use pesto, olive oil, or anything you have on hand.) 
Pepperoni with spinach, olives, and artichoke hearts  

Meatballs(recipe coming soon), olives, spinach/vegetarian pizza on other half 
11. Add your toppings. I have even made this recipe to make a dessert pizza. I put apples, cinnamon sugar, and butter. 
12. Cook on a preheated pizza stone for 8-10 minutes or until the cheese starts to bubble and brown.(you can put the pizza directly on the stone or on foil for easy clean-up) 
13. Enjoy! 
Thursday, January 22, 2015

Adapting the Classics: Coming Soon!

As many of my followers know I have not posted in a very long time. Without getting too much into detail, the past year has been filled with ups and downs, but through it all I have been able to turn to food in the process. While many assume that statement is due to eating, I in fact mean my love for baking and cooking. I find it reassuring that in every event, blessing, or trial that I experience, that the structure of baking will always be consistent. I find comfort that a tablespoon will always be a tablespoon, and that a little flour and sugar can create memories among family members. During this past year I have been testing some of my own gluten free recipes, but the ones I keep coming back to are some of my grandmother's that she found in various cookbooks throughout the years(I do plan on sharing some of my original recipes at a later point). One of the more notable favorites of my late grandmother were the Better Homes cookbooks(my grandmother had several). One thing during my time of absence from blogging that has been on my heart is the fact that many of my grandmother's recipes were not gluten free. However, since her passing I have truly missed many of the things that she made. This got me thinking that the majority of us grew up on our grandmother's, mother's, aunt's, uncle's (or even friend's) cooking and baking, but now that we are gluten free we feel as though we can no longer enjoy those recipes. After thinking about this, over the past year I have been adapting the classics(or those classic recipes that are so near and dear to my heart), in order that I might enjoy them again. Therefore, due to how much gratification I got out of being able to reconnect with my late grandmother through her recipes by not only making them (but eating them too), I have decided to share with you not only those beloved recipes from old cookbooks (made gluten free!), but show you how to use your own family recipes and make them gluten free as well. I will be doing a new series (the first on this blog), called "Adapting the Classics." I would also love to hear your stories surrounding your experiences of food and family. Also, I always love suggestions and feedback. Keep on the look-out for my first recipe, Chocolate-Chip Peanut Butter Cookie Bars(GF/DF)!


Until Then,

Saturday, September 28, 2013

The Fluffiest Focaccia! (Dairy-Free too!)

If any of you are like me(and I imagine most of you are) being gluten-free can be a challenge at times. Don't get me wrong I appreciate the fact that I don't feel like someone punched me in the stomach after eating a piece of bread anymore, but lets face it I miss the texture of wheat bread. That soft, squishy texture that only wheat bread can provide is one of the last things that I have had a hard time recreating to the point that I don't want to "cheat." Over the past four years I have tried and failed so many times it's gotten to the point where I was starting to believe that maybe all the gluten-free bread companies just had me beat. However, the other day my perspective on gluten-free bread from scratch totally changed. I had the strangest "aha!" moment the other day though. I was thinking to myself why had I never tried to use whipped egg whites in bread in order to build that structure that is found in wheat bread(Like gluten, egg whites build structure by trapping air in the baking bread.) So I figured what the heck, after many failed attempts I might as well give it another go(I think it's been about a year since I have tried making gf bread). You know what? I am very glad that I can sit here and say that I conquered gluten-free bread! This is the BEST gluten-free bread I have ever had in four years and is the closest to the texture of wheat bread that I have come across(dairy free too!)

I hope you enjoy these as much as I do! :)
 
xoxo,
Megan

Ingredients


Dry
~ 2 cups white rice flour 
~ 1/2 cup potato starch 
~1/2 tapioca starch 
~1/3 cup cornstarch 
~1 Tablespoon xanthan gum
~ 1 1/2 teaspoons salt 
~ 3 Tablespoons sugar 
~ 1 Tablespoon active dry yeast 
~ garlic powder(optional
~ dried parsley(optional) 
Wet 
~ 4 egg whites
~ 4 Tablespoons olive oil 
~ 1 teaspoon apple cider vinegar 
~ 1 1/4 cups warm water 

Directions 

1. Preheat your oven to 400 °FIn a bowl of a stand mixer put the active dry yeast, sugar, and warm water. Let the yeast proof for about 5-10 minutes(or until it looks very bubbly. 
2.In a stainless steel or copper bowl(I recommend a copper bowl for this step, although you don't have to have it-it does help the egg whites become even fluffier), put the egg whites along with a pinch of cream of tarter(use GFCF cream of tarter). Beat the egg whites until they are at a soft peaks. Set aside. 

Egg whites at the "soft peak" step


3.Now that the yeast has proofed, add the olive oil, the apple cider vinegar until just combined. 
4.  On a piece of wax paper(saves dishes!) put the rice flour, potato starch, tapioca starch, cornstarch, xanthan gum, and salt. After the flour mixture is in the stand mixer, using the paddle attachment, start slowly on the first setting and work your way up to the highest setting. Whip the mixture for about 3-5 min until creamy and all the flour is incorporated. Turn off the mixer and add the egg whites. Then turn the mixer back on to incorporate the egg whites(just until they are combined though because you don't want to loss all that air that we have built up). 
5. In a warm place in your kitchen(put a towel over the bowl to trap even more heat), let the mixture rise until the dough has risen about a quarter more than its original size(about 30 min). Next, place the mixture on a rimmed baking sheet and let rise once again for another 30 min. NOTE: Make sure that you spray the pan with nonstick cooking spray, otherwise your dough will stick. 
6. Sprinkle focaccia with garlic powder and dried parsley if desired. Bake focaccia for about 15-20 min or until light golden brown depending on your oven. Drizzle some more olive oil on the bread when its still warm. Enjoy! NOTE: This bread is amazing when served warm, however it is still great the next day if you warm it up in a pan or the microwave for a few seconds. Not a lot of gluten-free bread hold up their texture without becoming grainy(and this one DOES!) 


Wednesday, June 12, 2013

Chocolate Chip Marble Pancakes

I am one of the those kinds of people that doesn't like to do things the "normal way." I have always enjoyed experimenting and tweaking recipes to fit my particular taste. Looking back I don't think I have ever actually followed a recipe exactly. I have a habit of usually putting my own spin on something, whether that be adding or taking out ingredients. A few days ago I was actually researching wedding cake flavors and saw a chocolate marble cake. I happen to have just made pancakes and wondered if anyone had ever done a gluten-free, dairy free marble pancake. I researched it and found that there was no such thing. At first I was reluctant about how complicated it would be to accomplish this, but in the end is was a lot simpler than I thought (and totally worth it!) They are not only delicious but combine the best of both worlds. They are great for any crowd, whether you are entertaining chocoholics or simple vanilla lovers.

I hope you enjoy these as much as I do! :)

xoxo,
Megan

Ingredients

Dry
~ 1 cup white rice flour 
~ 1/2 cup cornstarch 
~ 1/2 cup sweet rice flour 
~ 1/4 cup granulated sugar 
~ 1/2 teaspoon salt 
~1/4 teaspoon xanthan gum  
NOTE: Split the above recipe in half and put in two bowls. The chocolate base and the vanilla base start with the same dry ingredients. You can add dairy free chocolate chips to the chocolate dry ingredients or at the end while cooking. 
Wet(Chocolate) 
~ 1 large egg
~ 1/2 cup Silk Chocolate Almond Milk (or any brand of chocolate almond milk) 
~ 1/8 cup canola oil 
~ 2 Tablespoon dairy-free chocolate syrup 
Wet(Vanilla) 
~ 1 large egg
~ 1/2 cup Silk Vanilla Almond Milk (or any brand of vanilla almond milk) 
~ 1/8 cup canola oil 
~ 2 teaspoons vanilla extract


Directions 

1 In two medium bowls, whisk together the dry ingredients. In a small bowl, whisk together the wet ingredients. Pour the wet ingredients over the dry ingredients and whisk until smooth. Note: You should have two batters (a chocolate and vanilla). 
 Heat griddle over medium to medium-high heat(depending on how efficient your griddle is). Pour the chocolate batter on one side and the vanilla on the other side to form one pancake onto griddle. Batter should "sizzle" when it hits the pan. Take a knife or a fork and swirl the batter to make the "marble" design. Place dairy free chocolate chips onto the chocolate side in order to reinforce the chocolate flavor. 
3 Cook for approximately 2-3 minutes. Flip pancakes when bubbles appear all over the surface of the pancake and begin to pop. The pancake should begin to look almost dry. Flip and cook another 1-1 1/2 minutes. 
4 Serve with dairy-free butter or/and syrup if desired. Enjoy! 

Monday, May 20, 2013

Vanilla Cinnamon Glazed Donuts

It's interesting how a combination of flour, sugar, eggs, and milk can bring back such fond memories. I remember growing up my dad or mom would take me to go get donuts at the local donut shop on special occasions. Whether it was a choir performance, because I was sick, or because I made straight A's in school that quarter, I always looked forward for the chance to get to taste a batch straight from the fryer. My family went so often that we had figured out the timing of when they put out the new ones. While I really enjoyed every flavor of donut I tried, there was one flavor that was still missing. I have always enjoyed vanilla and cinnamon, to the point that growing up I would put either vanilla or cinnamon on EVERYTHING. I wanted to try making homemade donuts growing up, but was always intimidated by the process. However, when I went gluten-free I no longer was given the same opportunities for getting donuts at a shop. Because I had not had a donut in almost 3 years I felt that it was the perfect time to try making them homemade with the flavor combination that I had always dreamed of.

Coming Soon! - I am experimenting with a vanilla maple glazed donut.

I hope you all enjoy these as much as I do! :)

xoxo,
Megan

Ingredients

Dry
~ 1/3 cup white rice flour 
~ 2 Tablespoons potato starch
~ 1 Tablespoon tapioca starch
~ 1/4 teaspoon xanthan gum
~ 3 Tablespoons sugar
~ 1/2 teaspoon baking powder
~ 1/8 teaspoon cinnamon
~ 1/8 teaspoon salt
 
Wet 
~ 3 Tablespoons vanilla almond milk
~ 1 large egg
~ 1 Tablespoon vanilla extract
~ 1/2 Tablespoon(1 1/2 teaspoons) Earth Balance soy-free buttery spread(you can use any vegan butter-I just prefer this brand)
 
Vanilla Glaze
~ 1/4 cup powdered sugar
~ 1/4 teaspoon vanilla extract
~1 teaspoon vanilla almond milk
 
Directions 
1. In a medium bowl, whisk together the dry ingredients. In a small bowl, whisk together the wet ingredients. Pour the wet ingredients over the dry ingredients and whisk until smooth.
2. While the batter is sitting heat a donut maker(If you don't have a donut maker you can use a mini donut pan and bake them in a 350° oven).
3. Pour the batter into the maker(or pan) and bake for about 2-3 minutes(or until they are light golden brown).
4. Let them cool on a cooling rack for about 2-4 minutes(or until you can touch them). While they are still warm(but not hot), dip the donuts into the vanilla glaze. Let the glaze dry. Enjoy!

Sunday, May 5, 2013

Double Double Chocolate Peanut Butter Pancakes

I first want to apologize for the amount of time that has gone by since my last blog post. Life has been crazy-busy for me lately, with lots of exciting and thrilling changes. One of these changes is me deciding to go dairy-free as well. This past year has been interesting to say the least, but I finally can say that even with all the ups and downs I have finished my first year of college. On a different note, the last couple months when I have gotten a free chance I have been developing and testing some new recipes that are dairy free as well as gluten-free. After countless failures of lumpy, grainy, or flavorless pancakes I have finally discovered the perfect pancake. This pancake is not for the faint of heart though. It is packed for chocolate flavor, with a hint of peanut butter. It is truly for all the chocolate lovers out there(including myself!).

Coming Soon! - I have developed a peanut butter and chocolate pancake that tastes like a Reese's peanut butter cup for those that like more peanut butter rather than chocolate.

I hope you all enjoy these as much as I do! :)

xoxo,
Megan


Ingredients

Dry
~ 1/2 cup white rice flour 
~ 1/4 cup cornstarch 
~ 1/4 cup sweet rice flour 
~ 1/8 cup granulated sugar 
~ 1/4 teaspoon salt 
~1/8 teaspoon xanthan gum 
~ 1/4 dairy-free chocolate chips

Wet 
~ 1 large egg
~ 1/2 cup Silk Chocolate Almond Milk(or any brand of chocolate almond milk) 
~ 1/8 cup canola oil 
~ 1/2 teaspoon vanilla extract
~ 3 tablespoons chunky or smooth peanut butter 

Directions 

1  In a medium bowl, whisk together the dry ingredients. In a small bowl, whisk together the wet ingredients. Pour the wet ingredients over the dry ingredients and whisk until smooth. 
2  Heat griddle over medium to medium-high heat(depending on how efficient your griddle is). Pour batter, approximately 1/4 cup, onto griddle. Batter should "sizzle" when it hits the pan. 
3 Cook for approximately 2-3 minutes. Flip pancakes when bubbles appear all over the surface of the pancake and begin to pop. The pancake should begin to look almost dry. Flip and cook another 1-1 1/2 minutes. 
4 Serve with dairy-free butter or/and syrup if desired. Enjoy! 


Sunday, September 30, 2012

Gluten-Free Biscuits(Updated)


For those of you who know me I love any kind of bread, including biscuits. However, when I discovered I had a severe wheat/gluten allergy I never imagined I would be able to have them again, let alone they be any good. Last Thanksgiving I made my Mom's biscuit recipe with the Better-Batter all purpose flour. While this mix of flour is perfect for cookies and cakes, I have discovered that it does not work well for biscuits. Over the past 8 months or so I have discovered that Cup4Cup(you can get it here) for biscuits makes a world of a difference. You can not see the difference between the two biscuits, but when you taste them I promise there is no aftertaste whatsoever. My parents, who both still eat wheat/gluten, tried them and I got their "stamp of approval."

 I hope you all enjoy these as much as I do! :)

 xoxo,
The Gluten- Free Project

Ingredients
~ 2 cups of Cup4Cup flour
~ 1 Tablespoon baking powder
~ 2 teaspoons sugar
~ 1/2 teaspoon cream of tartar
~ 1/4 teaspoon salt
~ 1/2 cup of butter
~ 2/3 cup of milk(you can also use buttermilk but it will be a thicker dough)


Flour mixture

biscuits baking


Finished biscuits


Directions
1. Preheat oven to 450° F.
2. In a bowl stir together flour, baking powder, sugar, cream of tartar, and salt.
3. Cut in the butter either with two knifes, a pastry cutter, or a paddle attachment for your electric mixer.
4. Add the milk. If the mixture seems dry add a little bit more milk.
5. You should have a dough that is not too wet and not too dry. (You should be able to touch it without it falling apart, or sticking to your hands.)
6. Using a ice cream scoop-er(like the ones you use for muffins)transfer the biscuits onto a baking sheet.
7. Bake in a 450°F oven for 10 to 12 minutes or until golden.
8. Serve warm. Enjoy!

Tuesday, December 20, 2011

Pizza/Dad's Birthday

Today is my dad's birthday. Although it is not considered a milestone like 18, 21, or 50, it is important to my family. It was not important because of how old my dad is today, but because of who my dad is. My dad and I have always been close. A couple days ago I asked my dad what he wanted for his birthday dinner. I expected to hear salmon or roasted chicken, but instead he said pizza. Now many of you in the gluten-free community know how difficult it is to have good pizza. Over the last year I have made countless recipes trying to perfect something that was a Friday night staple in our house when I was growing up. I thought that this day would never come, but about a month ago I discovered the perfect pizza crust. It took a lot of tweaking but I finally have a dough that you can touch with your hands, not spread with a knife. I am ecstatic that I was able to have the perfect pizza crust recipe for my dad's birthday this year. If you are anything like me, pizza is the one thing that you miss the most when going gluten-free. Here is the recipe that is the game-changer. Go ahead... it's ok if you dance a little after making this(I won't tell anybody.)

Ingredients  
~ 1 teaspoon sugar
~ 1 cup lukewarm water
~ 1 teaspoon dried active yeast
~ 1 1/4 cups rice flour
~ 3/4 cup potato starch, extra for dusting
~ 1/2 cup tapioca flour
~ 1 teaspoon xanthan gum
~ 1 teaspoon salt
~ 1 Tablespoon olive oil
~ 1 egg

Directions 
1. Preheat your oven to 500 ° F 
2. Add your flours, salt, and xanthan gum in a bowl and mix well.
3. In a second bowl, add yeast, sugar, and lukewarm water. Wait about 5-10 until the yeast has "proofed." 
4. Add to this(yeast mixture) the olive oil and egg and mix well. 
5. Form a well in the center of your flour mix and add the liquid gradually, incorporating it into the flour. 
6. Continue to mix until the ingredients form a dough ball.(I use a Kitchenaid) 
7. Remove dough from bowl and knead lightly on a dusted(with potato starch) board. This ensures the dough is thoroughly mixed. 

8. Put the dough back in the bowl, cover with a tea towel, and place somewhere warm for 20-30 minutes to allow the dough to rise.(It will not double in size like wheat dough, but it will poof up a little.) 
9. After the dough has been allowed to rise and divide the dough in half. 
10. Flatten out the dough using your hands or a rolling pin. You want the dough to be about 1/4 inch in thickness. 
10. Add a sauce(I use tomato but you can use pesto, olive oil, or anything you have on hand.) 
Pepperoni with spinach, olives, and artichoke hearts  

Meatballs(recipe coming soon), olives, spinach/vegetarian pizza on other half 
11. Add your toppings. I have even made this recipe to make a dessert pizza. I put apples, cinnamon sugar, and butter. 
12. Cook on a preheated pizza stone for 8-10 minutes or until the cheese starts to bubble and brown.(you can put the pizza directly on the stone or on foil for easy clean-up) 
13. Enjoy!